
Since browser-based ML tools such as Edge Impulse became established, one thing has become clear: web-based AI design tools from the world of machine learning are here to stay. With Google AI Studio, the tech giant is now presenting its own web-based version, which provides various in-house models for experimentation.
To activate Google AI Studio, enter the URL https://aistudio.google.com in your browser of choice. If you just want to experiment, click on the Playground option that appears at the top of the toolbar on the left. The window shown in Figure 1 will then appear in the middle, in which Google promotes a wide variety of models for evaluation.
Sign Up for Our Newsletter
Stay Tuned & Learn more about VibeKode:
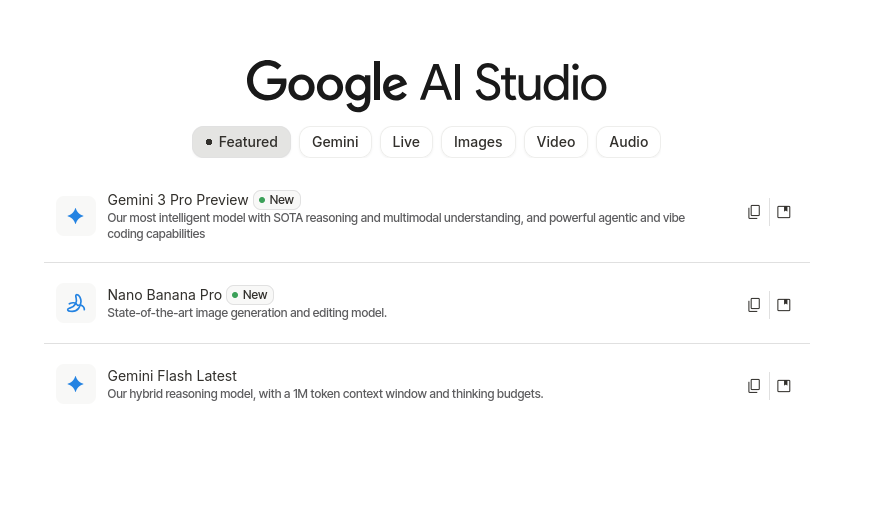
Fig. 1: The latest models can be found in the Featured section
In the following steps, we want to experiment with an image generation model, so we switch to the Images section. Google AI Studio offers several image-capable Gemini variants. Model names and availability change quickly; at the time of writing, these include models such as Nano Banana Pro and Gemini 3.1 Flash Image.
For fast experimentation and high-volume use cases, Google currently positions Gemini 3.1 Flash Image Preview as the more efficient option, while Nano Banana Pro targets maximum output quality. Access to paid usage and higher quotas requires a properly configured Gemini API key and billing setup.
Settlement: a digression
Clicking Link API key or Get API key takes you to the key and project management workflow in Google AI Studio. In current versions, Google centralizes this process more clearly than before: you create or select a Google Cloud project, generate an API key, and connect billing through AI Studio’s billing page.
Since March 2026, Gemini API and AI Studio billing have been organized around Prepay and Postpay plans rather than the older tier wording used in earlier interfaces. In practice, this means that developers should not rely on specific tier labels in the UI, as Google may change billing terminology and quota structures over time. Instead, the important step is to verify that the selected project has an active billing configuration and a valid Gemini API key assigned to it. AI Studio may also create a default project and key automatically for some new users after the Terms of Service have been accepted.
After successfully generating the key, we return to the Playground, where we now click on the button shown in Figure 2. In the window that appears, we can select which key to connect.
AI Studio then confirms that the session is using the selected paid API key and that requests in the current session may incur charges. The exact wording depends on the current interface version, so it is best treated as a status confirmation rather than a fixed UI string.
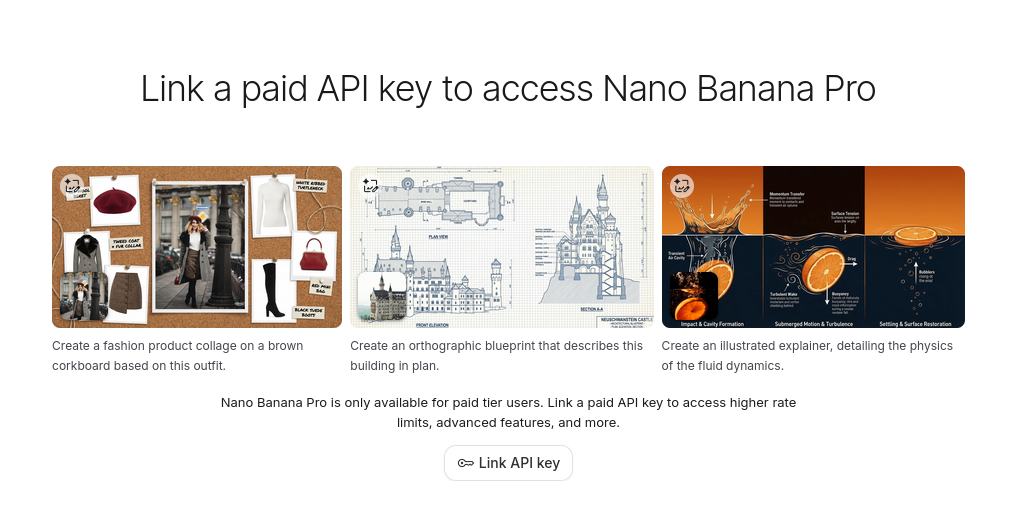
Fig. 2: One key may be selected
The execution of the entered prompts then requires pressing CTRL + ENTER. Figure 3 shows how the model responds to the request “Please generate a picture of a TU-144 taking off from Tunis-Carthage International Airport in Tunis.”

Fig. 3: Note the correct tower in the background and the correct registration number
On the right-hand side, the system displays various parameters that allow you to adjust the model parameters. For example, we could use Resolution to specify a higher resolution—but it should be noted that even generating the image shown here took around 30 seconds. You should also keep in mind that higher resolutions naturally incur higher costs.
Last but not least, interactions created in Playground are usually temporary and are lost after restarting the browser window. This is because Google wants to charge for the storage space used. Clicking on the Enable saving option allows you to add a link to Google Drive.
Generating this one image costs 14 US cents. The cost of generating a single image depends on the selected model and output resolution. Current Google pricing places image generation roughly in the low double-digit cent range for some preview models, with higher resolutions costing more. For sustained use, it is therefore important to compare model choice, latency, and image size against the expected workload. For intensive use in particular, either a subscription should be taken out, or a local version of the AI should be considered.
Exporting ready-to-use code
The long-term goal of the feature just introduced is not to replace consumer-facing AI. Rather, Google aims to encourage developers to integrate AI models into their own applications. Clicking on the Get Code link in the upper right corner brings up a dialog box where program code written in various programming languages can be harvested.
Those who opt for Python code receive a fairly complete starter implementation. Installing the Google GenAI library (pip install google-genai) remains necessary. This library also contains the actual generation of the AI output (Listing 1).
Listing 1
def generate():

client = genai.Client(

  api_key=os.environ.get("GEMINI_API_KEY"),

)

model = "gemini-3-pro-image-preview"

contents = [

  types.Content(

    role="user",

    parts=[

      types.Part.from_text(text="""INSERT_INPUT_HERE"""),

    ],

  ),

]
It should be noted that the generated code is not immediately ready for use. To make it usable, it is necessary to enter parameters and the API key manually. In addition, in the author’s opinion, the generated EA code is unnecessarily complex in places.
The advantages of the system
Clicking on the model name displayed in the upper right corner opens an embedded version of the model selection window used above. For example, if you select one of the current speech-capable models in the Audio section—such as Gemini 3.1 Flash TTS Preview—you can quickly prototype complex spoken interactions with multiple speakers and configurable voices. Arrays with extensive settings are required to configure such outputs. The Get Code button mentioned above then automatically takes care of generating it:
Listing 2
types.SpeakerVoiceConfig(

  speaker="Speaker 1",

  voice_config=types.VoiceConfig(

    prebuilt_voice_config=types.PrebuiltVoiceConfig(

      voice_name="Zephyr"

    )

  ),
Here, too, some settings—such as the API key—must be entered manually. However, the overall effort involved is significantly less than with a complete new implementation.
Automatic generation of complete web applications from prompts
In the Build section, Google offers a Vibe coding environment that primarily generates React applications based on TypeScript; Angular can also be selected in the settings where available. Current documentation emphasizes a React-based frontend and a Node.js server-side runtime, along with support for secure secrets handling and npm packages.
For a first attempt, it makes sense to implement a resistor calculator that converts the color code of the resistor body into usable calculation values. A suitable prompt would be: “I want to create an application that decodes the resistor color code. The user will be given five combo boxes to select the color, and the application should then show the tolerance and the computed value.”
The result is the system shown (Figure 4). It should be noted that the preview displayed on the right provides a fully operational version of the program. A quick test by the author revealed no abnormalities. However, it is interesting to note that an AI box is displayed at the bottom right.
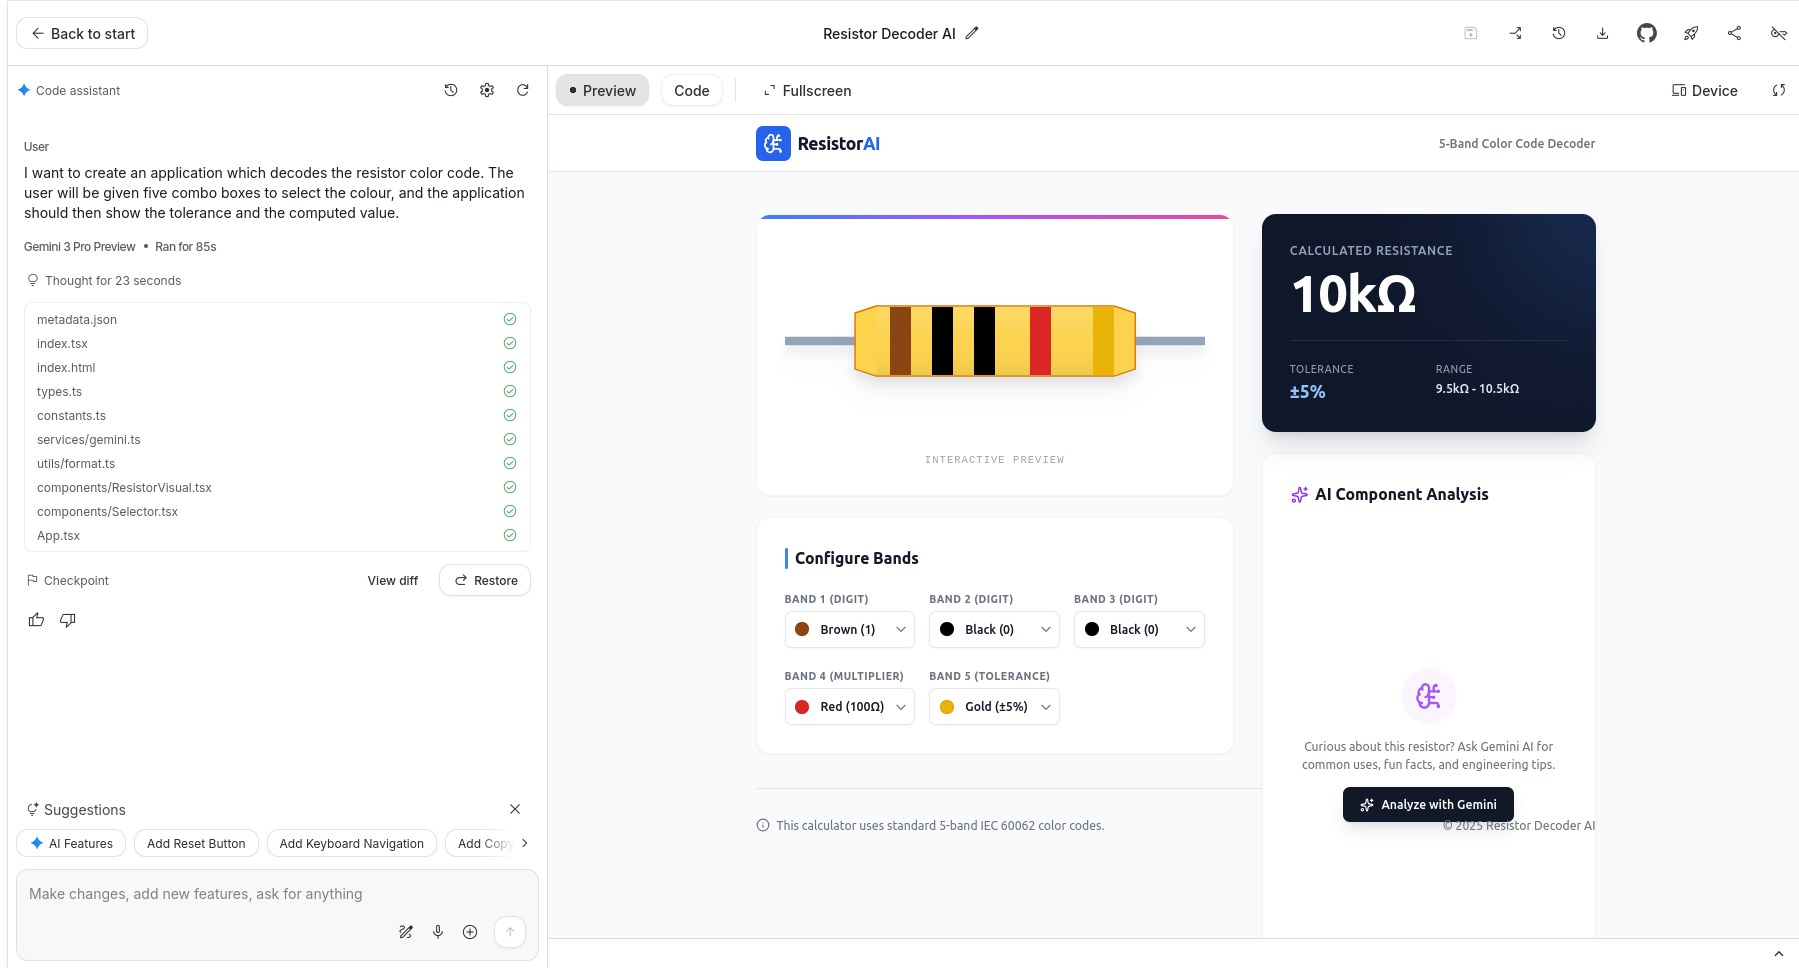
Fig. 4: Resistance calculator à la AI
The code function allows you to view the generated compilation. Clicking on the device option allows you to adjust the viewport. This allows you to emulate the display on tablets and/or smartphones, which helps with user interface verification. The Export to GitHub function allows you to transfer the generated project into an external version control workflow, while local export options can be used when further development should continue outside AI Studio.
Vibe coding-based systems often reach their limits when it comes to customizing the initially generated project skeleton. AI Studio addresses this problem with the concept of checkpoints: similar to checking in to a CVS, this is a base point against which further requests are applied. As soon as the system gets stuck or the results are unsatisfactory, developers can return to the previous point at any time.
The next step is to submit a request: “Please make the resistor outline three-dimensional.”
The result is the screen image shown in Figure 5. It is interesting to note that AI achieves the increase in three-dimensionality by adjusting the style sheet rather than resorting to WebGL and similar technologies. In addition, the system provides textual information about the changes that have been made to the project.
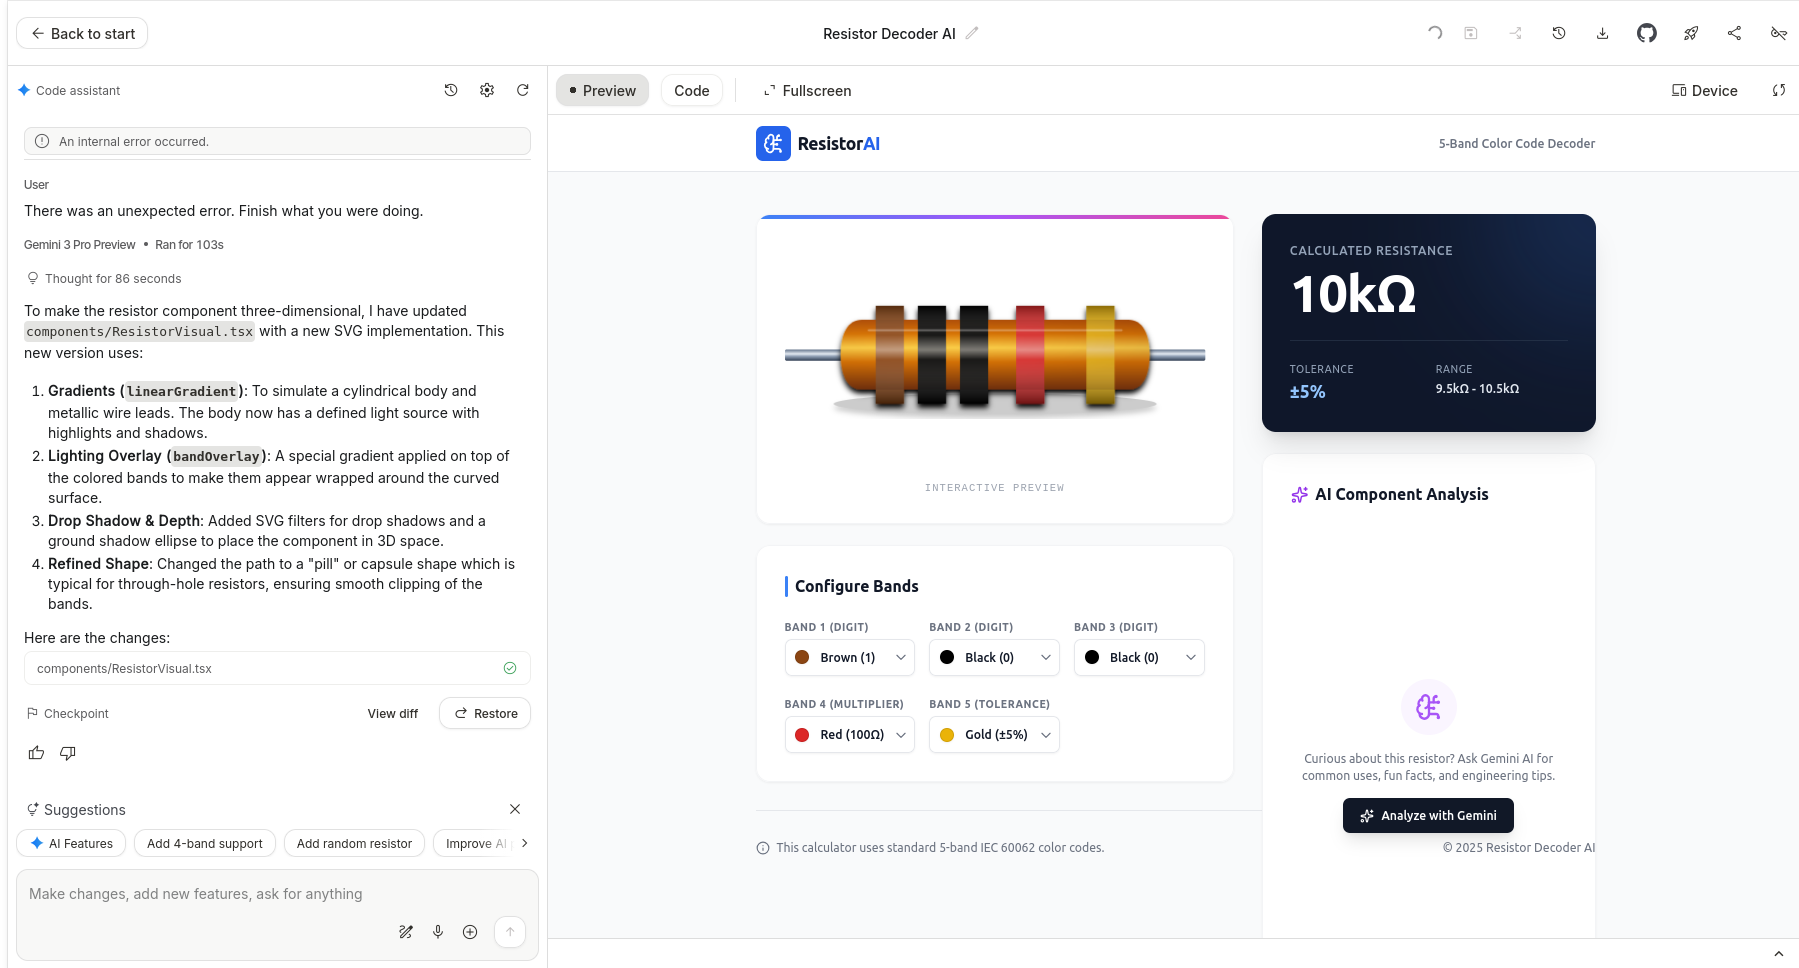
Fig. 5: And now in three dimensions
Hosting the generated application outside AI Studio
Although clicking on Fullscreen allows for full-screen interaction with the application, deployment requires a little extra work for general users. The easiest way to get started is to use Google Cloud. Specifically, Google provides detailed hosting information as a documented Cloud Run service at https://cloud.google.com/run. After clicking on the Deploy link, a selection window opens in which the Google Cloud project to be used must be selected. In the author’s tests, the actual delivery of the project took around 45 minutes. After manual termination, a reference to an error message appeared that was not resolved in Google’s documentation. A second attempt then ran within a few seconds and provided information about the URL for calling up the project (Figure 6).
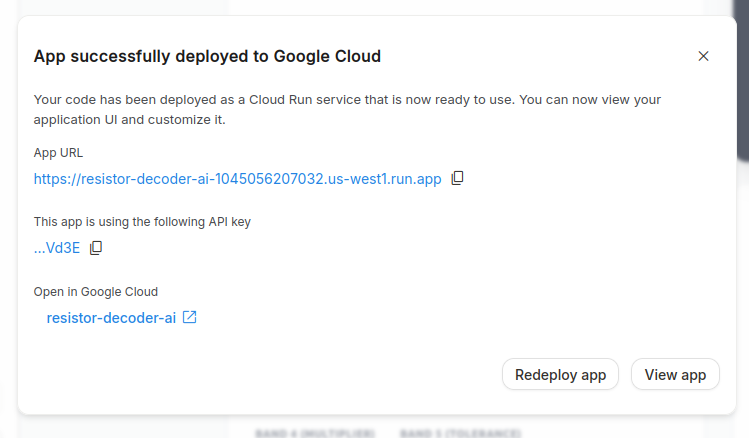
Fig. 6: Successful deployment
It should be noted that a deployed application may be publicly reachable and can generate ongoing Gemini API usage on the project owner’s account.
Even though AI Studio now supports server-side runtimes, secure secrets handling, and Cloud Run deployment, developers still need to think carefully about abuse prevention, quotas, and access control before exposing such an application to the public internet. To avoid costs, it is strongly recommended that additional access protection be implemented.
Sign Up for Our Newsletter
Stay Tuned & Learn more about VibeKode:
Conclusion
With Google AI Studio, Google provides developers with a powerful tool that facilitates the exploration of AI-based systems. The author hopes that the experiments shown here will motivate readers to try out the platform for themselves. The platform is evolving quickly, however, so model names, billing flows, and deployment details should always be checked against the current documentation before moving from experimentation to production.
Author
🔍 Frequently Asked Questions (FAQ)
1. What is Google AI Studio?
Google AI Studio is a web-based environment for experimenting with Google’s Gemini models. The article describes it as a tool for image generation, audio workflows, prompting, code generation, and full-stack app prototyping.
2. How do developers access Google AI Studio?
Developers access Google AI Studio through aistudio.google.com. The article explains that users can enter the Playground from the left toolbar to evaluate available models.
3. Which image generation models does the article mention?
The article mentions image-capable Gemini variants including Nano Banana Pro and Gemini 3.1 Flash Image. It notes that model names and availability change quickly, so developers should verify the current options before relying on them.
4. How are API keys configured in Google AI Studio?
The article explains that developers can create or select a Google Cloud project, generate a Gemini API key, and connect billing through AI Studio’s billing workflow. Since March 2026, the article says billing is organized around Prepay and Postpay plans rather than older tier terminology.
5. What should developers know about image generation costs?
The article states that one generated image in the example cost 14 US cents. It also notes that actual costs depend on the selected model and output resolution, with higher resolutions increasing cost.
6. Can Google AI Studio export code?
Yes. The article explains that the Get Code function can generate starter code in multiple programming languages, including Python. Developers still need to install the Google GenAI library and manually add parameters and the API key before using the generated code.
7. How does Google AI Studio support audio prototyping?
The article describes using speech-capable models such as Gemini 3.1 Flash TTS Preview to prototype spoken interactions with multiple speakers and configurable voices. Google AI Studio can generate configuration-heavy code for these outputs, reducing implementation effort.
8. What does the Build section do in Google AI Studio?
The Build section provides a Vibe coding environment that primarily generates React applications based on TypeScript. The article’s example creates a resistor color-code calculator with combo boxes and a working preview.
9. What are checkpoints in Google AI Studio?
Checkpoints are base points developers can return to when generated changes become unsatisfactory. The article compares them to checking into a version control system and describes them as useful when customizing an initially generated project skeleton.
10. What should developers consider before deploying AI Studio apps?
The article warns that deployed applications may be publicly reachable and can generate ongoing Gemini API usage on the project owner’s account. It recommends thinking carefully about abuse prevention, quotas, access control, and additional access protection before exposing an app to the public internet.